
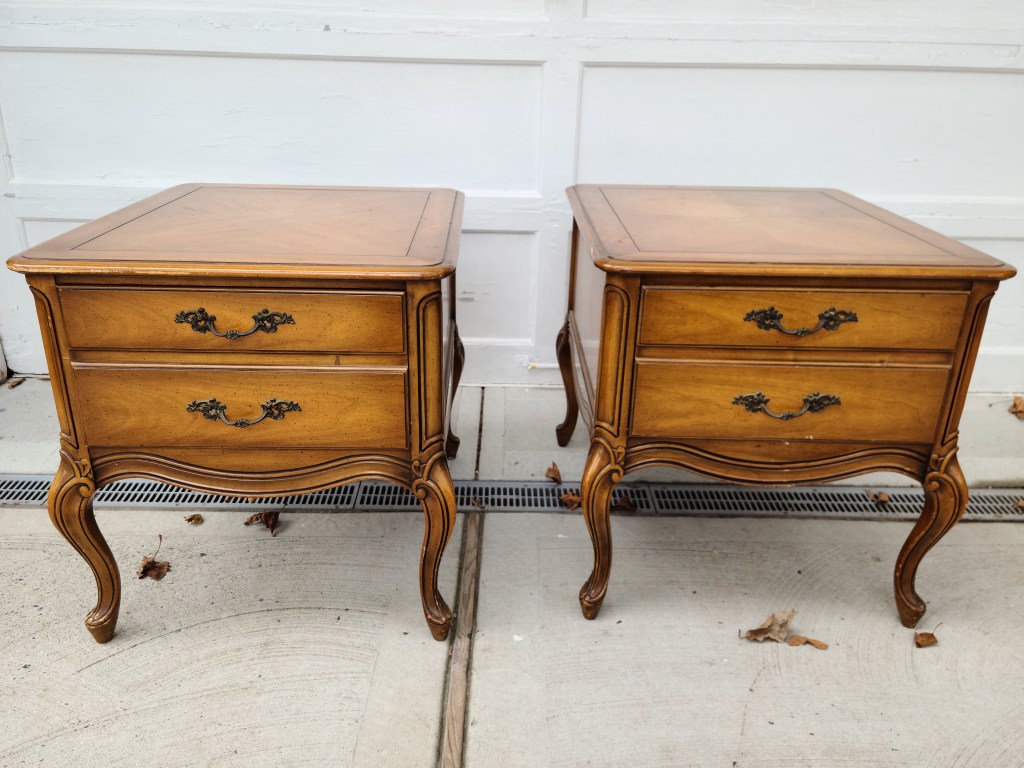
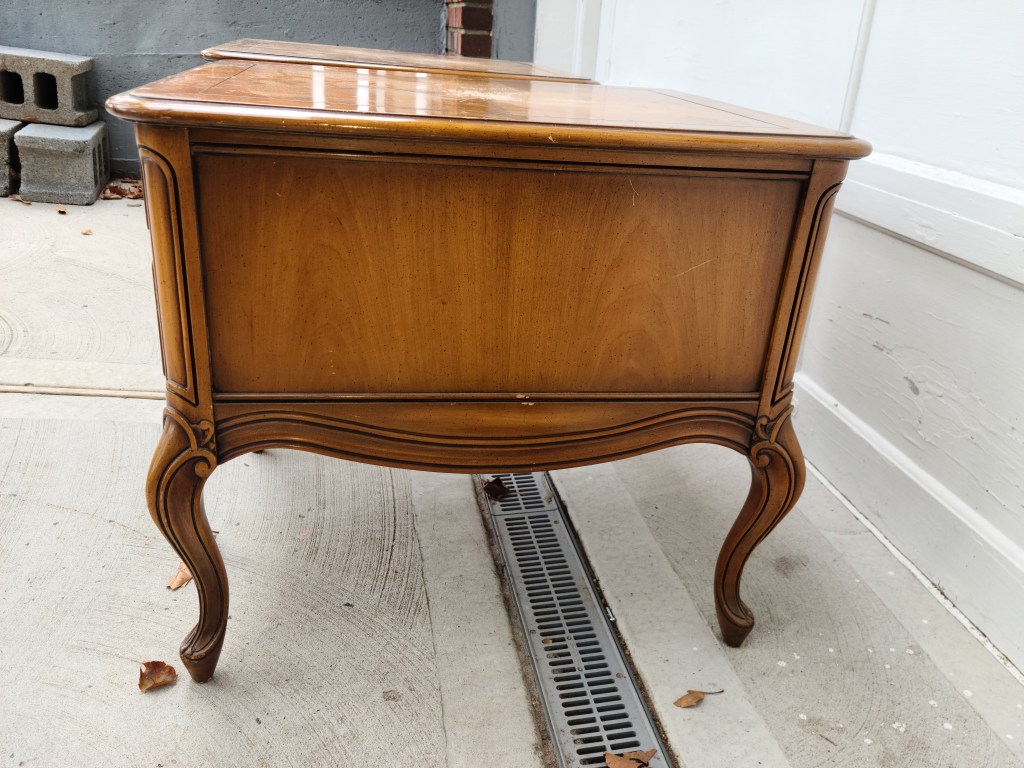

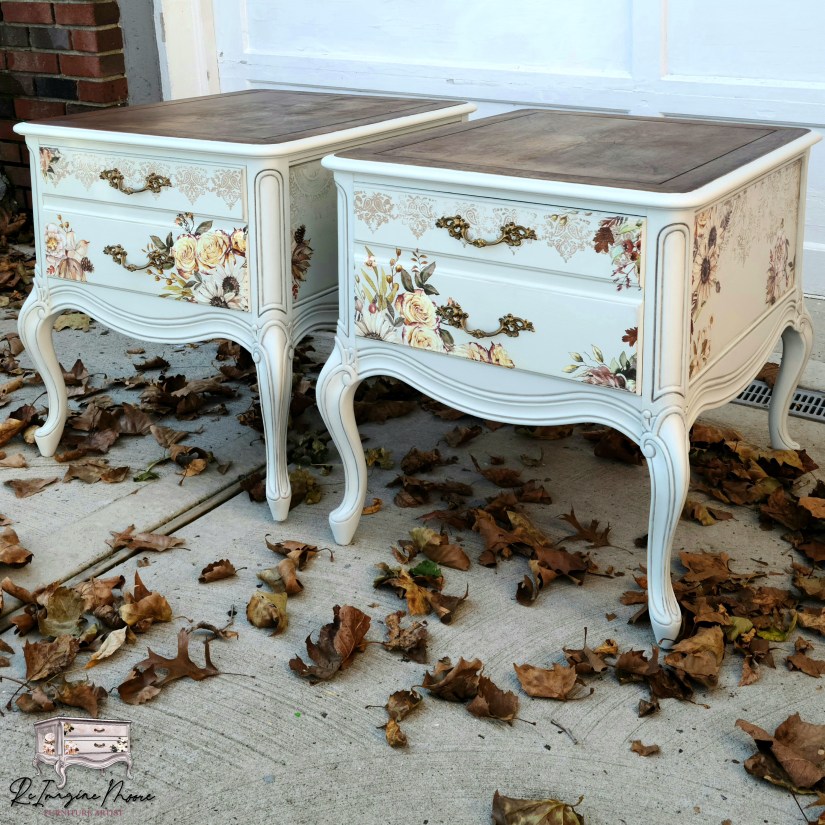
These two side tables were so much fun to redo. They were made by Weiman Furniture Co. which was a quality furniture company established in the 1940’s or earlier. With my research I suspect these were made between the 1950’s and the 1960’s. These are the first pieces I actually bought to redo which is not what I normally do, but I knew these were vintage and I could not pass up the price. I paid $20 for the pair, which is a steal! I also purchased a drum table which you can read about here.
Cleaning
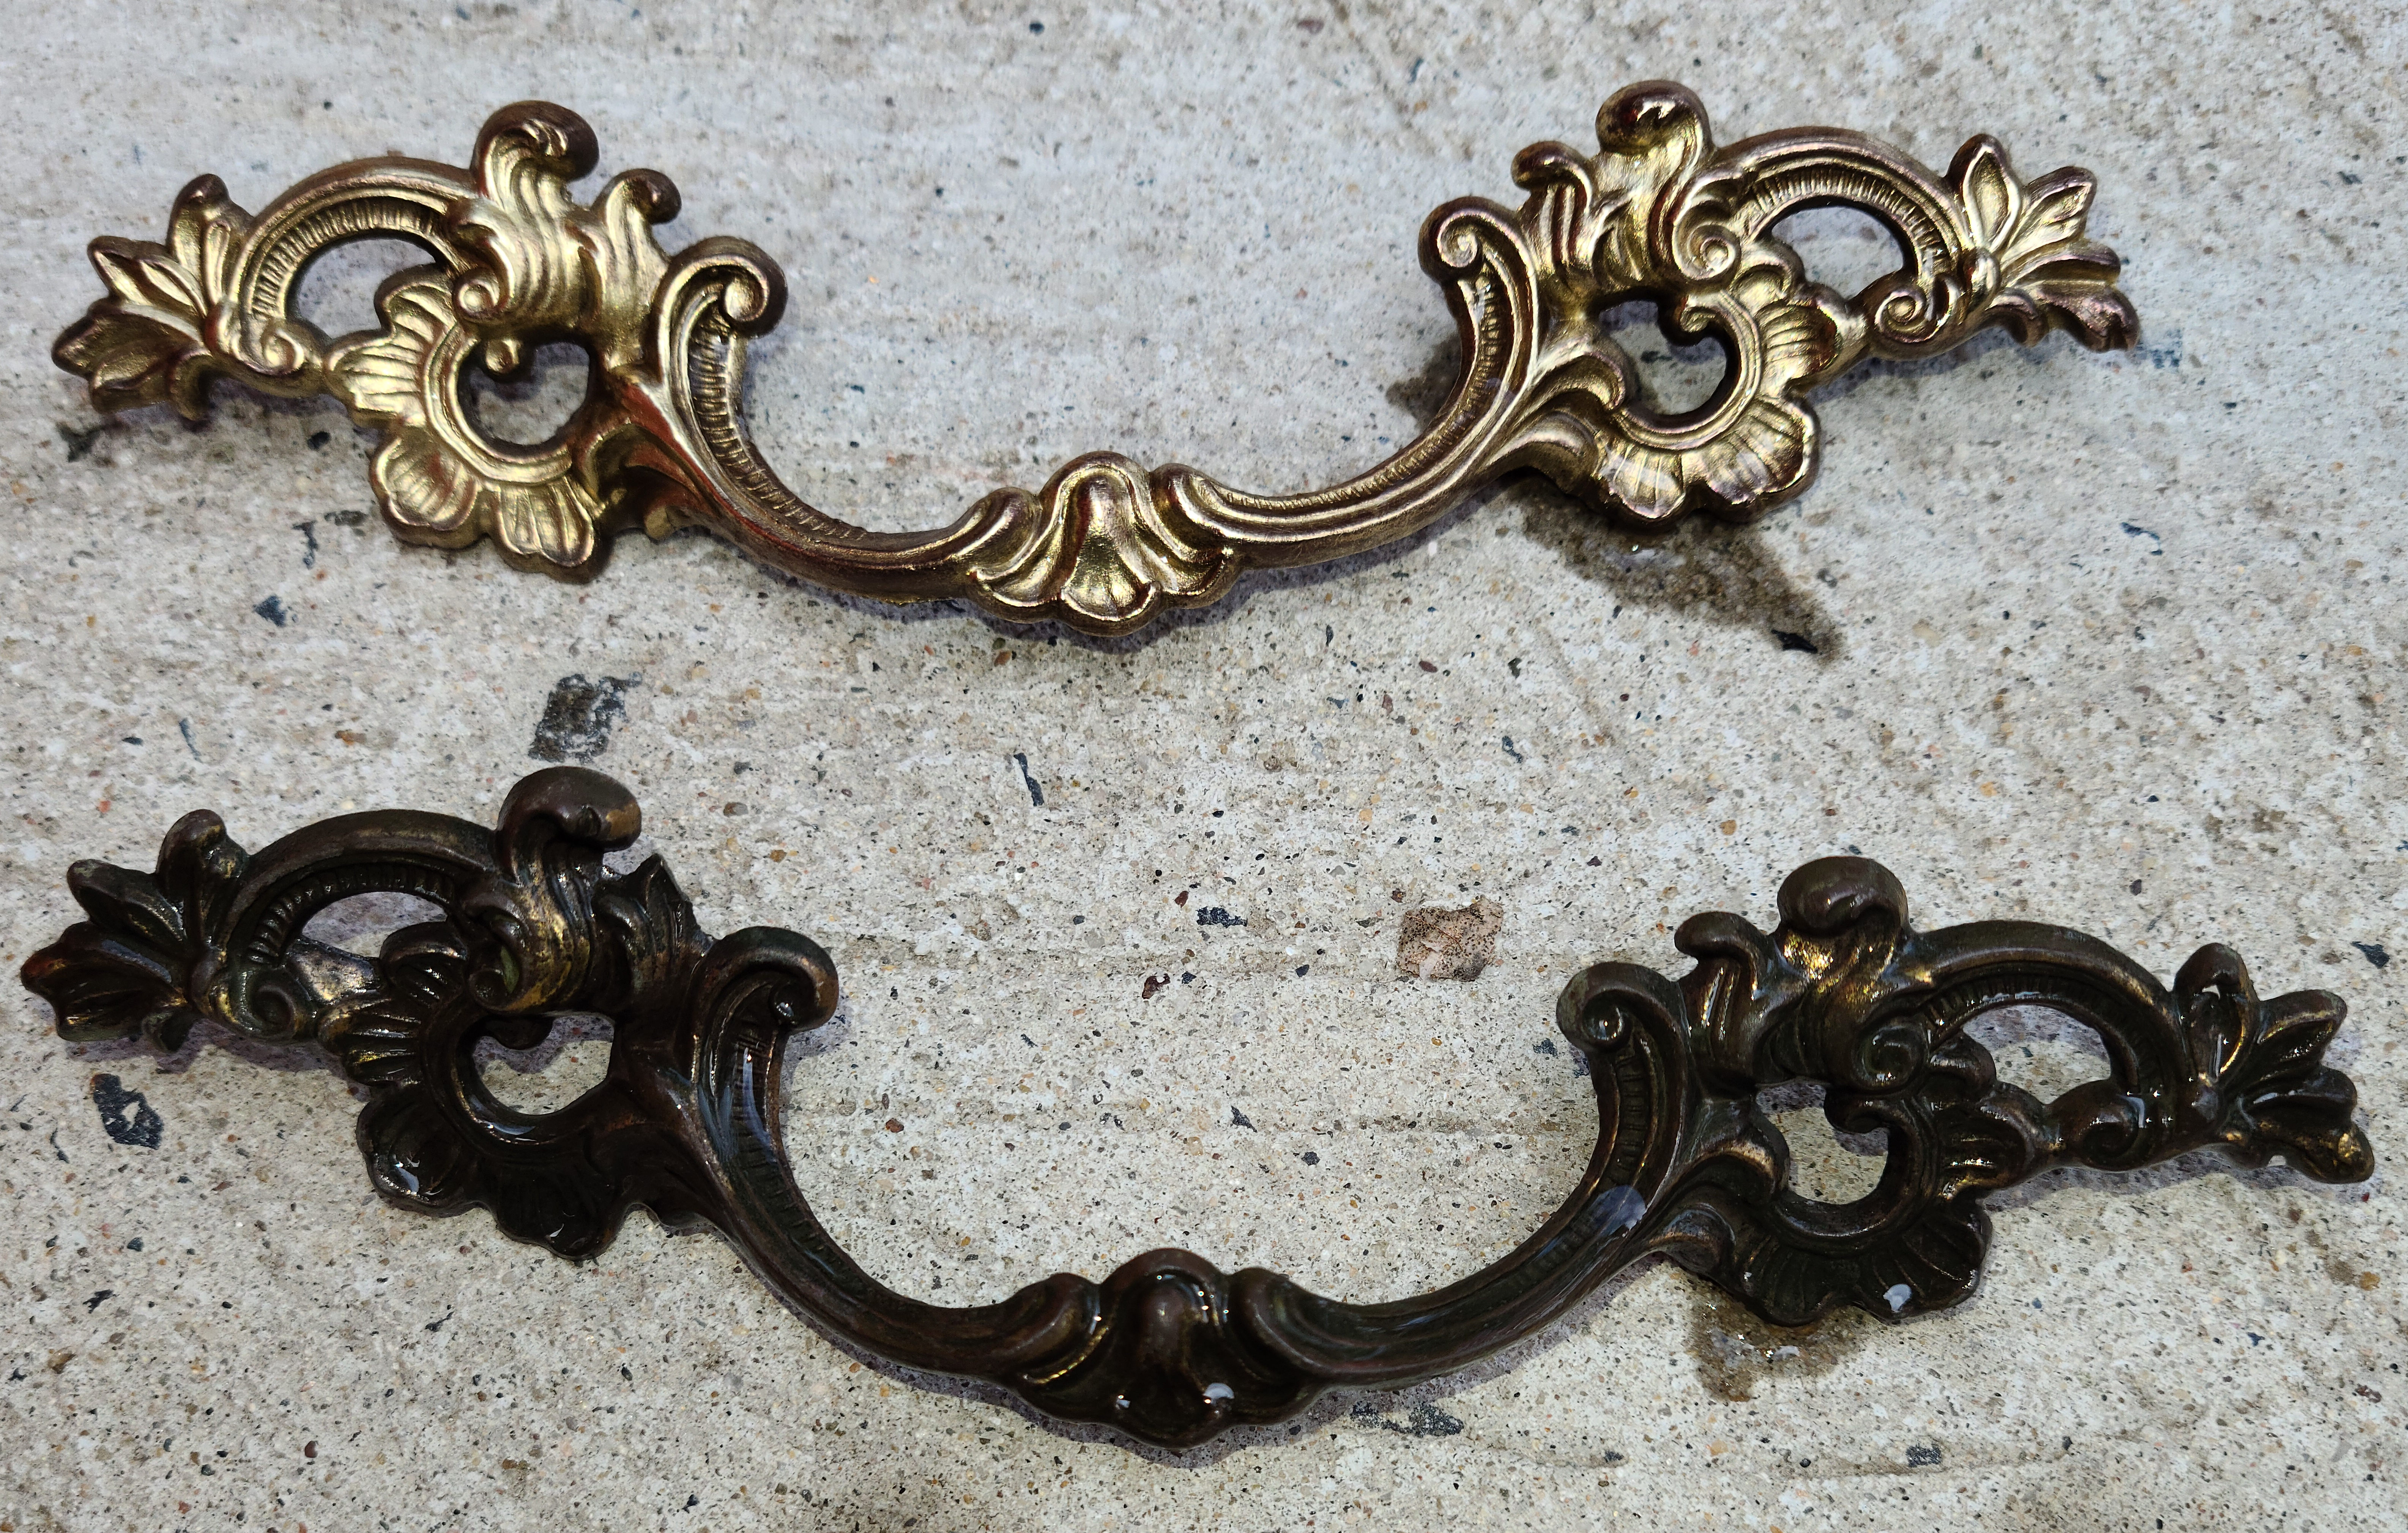
Starting with Dixie Belle’s White Lightening cleaner, I gave these two a good clean. All you need is a little bit of the cleaner mixed with warm water. Make sure to wipe your furniture with a clean rag and plain warm water after cleaning to get any remaining cleaner off your piece. Before starting to clean I dropped the hardware pulls into the bucket of water with the cleanser and allowed it to soak while I wiped down both pieces. By the time I was done cleaning the pieces the hardware had enough time to soak and I was able to easily clean the pulls using a brass wire brush.
Stripping
By looking at tops of the piece you can tell that there is veneer on them. Wood does not naturally make those shapes you see in the middle, so if you do not see wood grain going in one single direction, that is a clear indicator that its veneer. Because I didn’t want to blow through the veneer sanding off the finish, I used Klean Strip Premium Stripper. This was my first time using this stuff and it STINKS! Make sure to use this in a well-ventilated area or outside. I left on for about 10 -15 minutes and then used a plastic putty knife to scrape off. I did not do this, but you can put cerium wrap or plastic bags over the stripper to prevent it from drying. It will be very difficult to remove the stripper if it dries. After removing the stripper, wipe the areas with mineral spirits. I went ahead and started sanding the tops with my orbital sander and using 80grit. Because I did not fully remove the stripper, it started to eat up my sandpaper. It looked like there were just little chunks on the paper, when this happens it will prevent the paper from actually doing its job and it will not sand anything, so make sure to not let your stripper dry and remove all of it. I had to pretty much keep switching my sandpaper till it all came out and then was able to actually sand the tops. I then hand sanded the tops with a 120grit sanding sponge. I also scuff sanded the rest of the piece with a 220 sanding sponge.
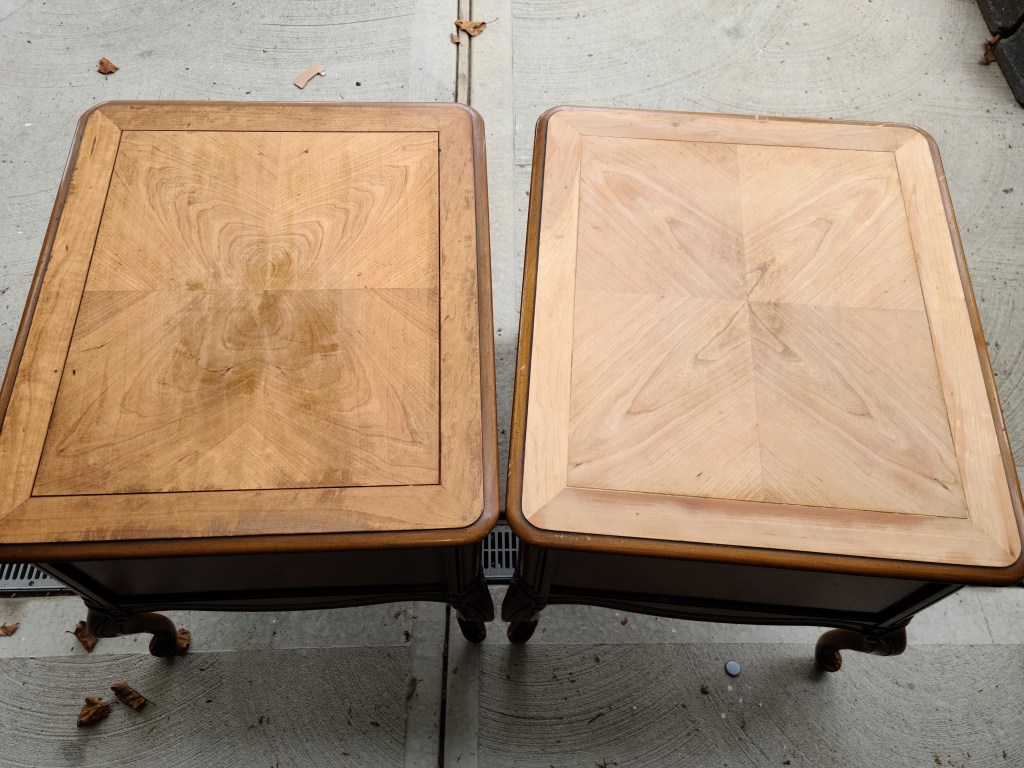
This photo was taken after the stripper was removed. The piece on the right was sanded and the one on the left was not. You can actually see spots on the left, these were areas where the stripper was not fully removed from the piece. You can also see that I blew through the veneer on the table to the right. If you look towards the bottom there is a dark line, yea I sanded too much in the area and guess what, there’s no fixing so try not to do that.
Painting
After wiping away all the dust it was time to paint. So, for this piece I wanted to do a neutral color because at this point none of my pieces had sold yet. I went with Dixie Belle’s Silk-all-in-one paint in the color Oyster. This paint does not need priming or a topcoat so to make my life easier I gave it go and I very much approve, well, that is until I got to the transferring part, but I’ll explain that in a bit. I applied two thin coats of the silk paint and the coverage was perfect. I used my new palm pro Zibra brush (which I Love) to apply the paint. These brushes are great quality and when you compare the price to other brushes out there, they are really worth it. You can save much more when purchasing a set of different brushes which is what I did, and I believe there is also a coupon on your first order. You can get a set of 5 brushes for the price of just 2 other name brand brushes.
Stamping
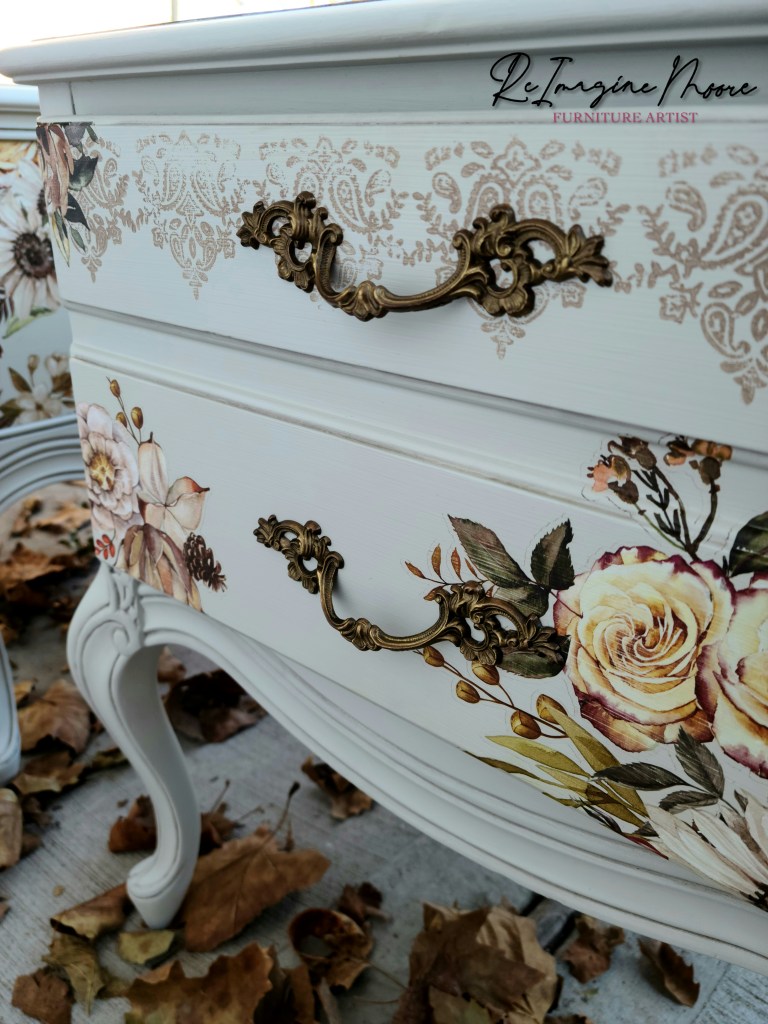
After the paint was fully dry, I started stamping my piece. Before placing my stamp, I realized here that maybe using the silk all in one paint may have not been the best choice when layering on a piece. Why? Because it has a topcoat and paint needs something to stick to so now, I had to lightly scuff sand the areas I was placing my stamp on to make sure my chalk paint would adhere properly and not ship off. Anyways, I mixed Dixie Belle’s chalk paint in the color mud puddle with just a little bit of caviar to darken it. I placed this paint on Redesign with Prima’s Bohemian Floral stamp using their acrylic block and foam roller. I used two different stamps to stamp the draws and around the entire two pieces. These rubber stamps give off a beautiful natural distress look.
Transfers
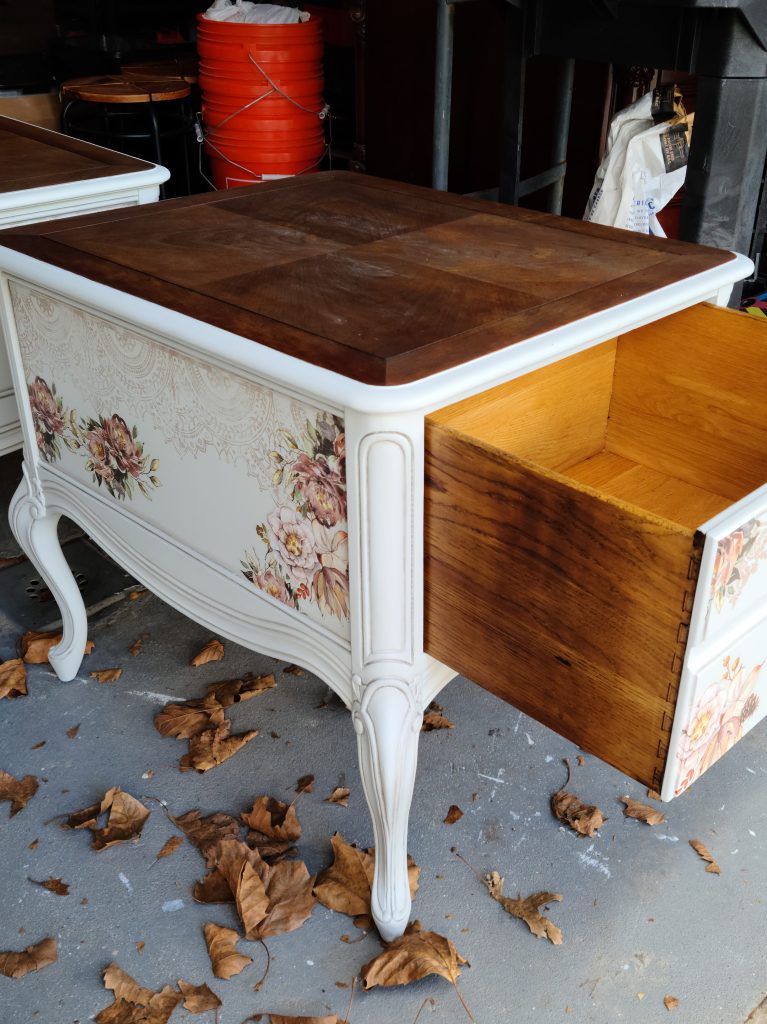
No was time for one of my favorite parts, transfers. Like the pink desk with the hutch, I picked the transfer I wanted to use before picking anything else I wanted to use on this piece including the color. I like to pick the images first since that is usually the first thing anyone will notice because they stand out the most then I coordinate everything else around the images or transfers I use. I used Redesign with Prima’s Sunflower Farm’s transfer for these pieces. I used almost the entire transfer for these pieces and cut up the whole thing to piece it the way I wanted on the pieces. This took a long time because I wanted to make sure both pieces were balanced with the number of transfers I put on each piece and the locations in which I placed them. I used painters’ tape to hold the images on the pieces while I mapped out the entire thing and once, I liked where everything was placed, I started to rub the transfers on.

So, this was the point where I really realized that I maybe should not have used the silk-all-in-one paint for this particular project. Now, I do not know this to be fact, but I assume because of the topcoat on the paint, I believe it caused my transfer to not fully adhere properly and caused many, many small bubbles. It could have just been something wrong with the transfer as well, I have no idea. All I know is that it was a pain to get these transfers on. No matter how much I rubbed it would not fully stick, I would have to rub and pull the plastic off very slowly, place the plastic back on rub over the same spot to make sure it fully stuck. Then there were sooooo many little bubbles, I must of have spent an hour just popping bubbles with a blade and rubbing back over the transfer with a cloth. Seriously that whole process made me not want to ever use a transfer, but I got through it and got over it once I saw how beautiful the transfer looked on the pieces. I distressed the transfer with a 220-grit sanding sponge to match the distressed look on the stamps. I absolutely love how the stamps and transfer images just come together on this piece. I sealed the front and sides of these pieces with Dixie Belle’s Satin Clear Coat.
Black Wax
Next was time to bring all those beautiful details out. You can use glaze to do this as well but that will darken the entire piece slightly and I just wanted to bring out the details without changing the color. I used Dixie Belle’s Best Dang Wax in black and an artist brush to do this. I used the artist brush to get into the crevices of the pieces and around the indents to create some shadowing. Work in small areas at a time and wipe back as much or as little as you’d like using a cloth. Tip: you can use a baby wipe to remove more of the wax if the cloth isn’t taking enough off. You can see in the photo how much of a difference the wax makes.

Stain
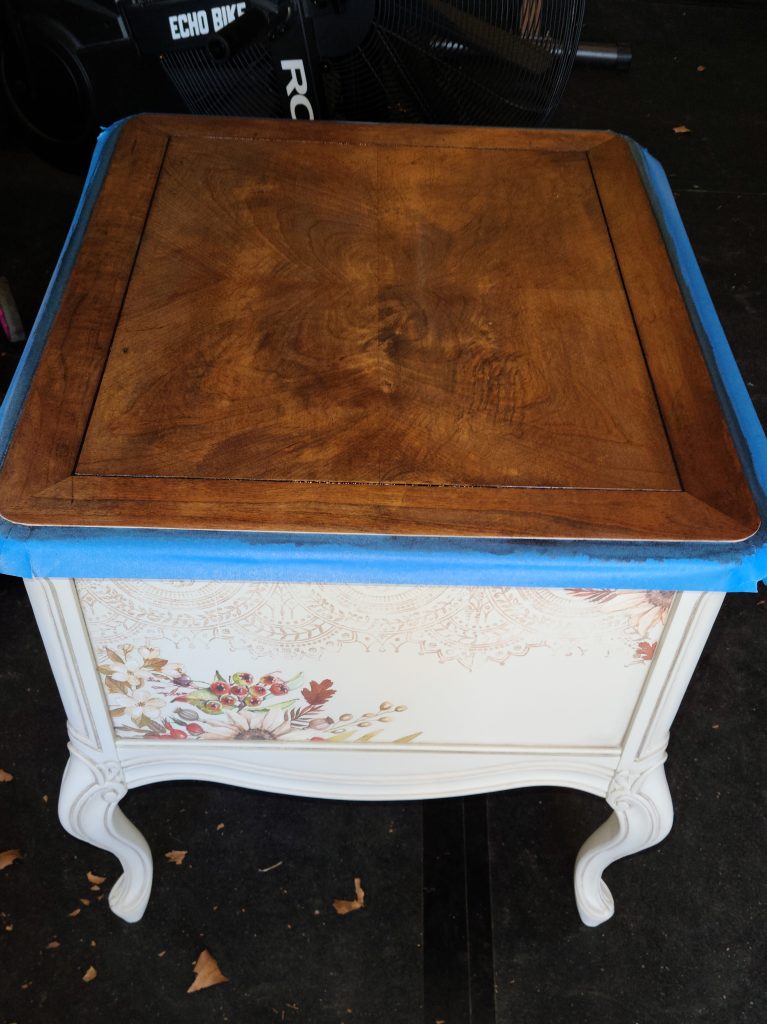
I chose to do stain last, but I would recommend doing it before painting. The area I stained had a tiny bit of a lip and I also taped off the white area thinking this would be enough to not get the stain on my paint. However, the stain bled through the tape in some areas, not much but it still caused me to touch up the areas. The stain brand I used is Minwax in the color espresso. I used a stain brush to apply the stain in the small sections and wiped away an excess fairly quickly with paper towels. A stain brush is really not necessary, a foam brush will do just fine as well. I applied two coats of the stain and waited 48 hours till I applied the topcoat. The reason for this, is to give the stain enough time to dry because the stain is oil and the Dixie Belle topcoats are water, and we know oil and water do not mix. And if you didn’t know well, now you know lol. I lightly sanded the outside of the draws and applied one coat of the stain on there as well because the original wood was way too orange.
Final Touches
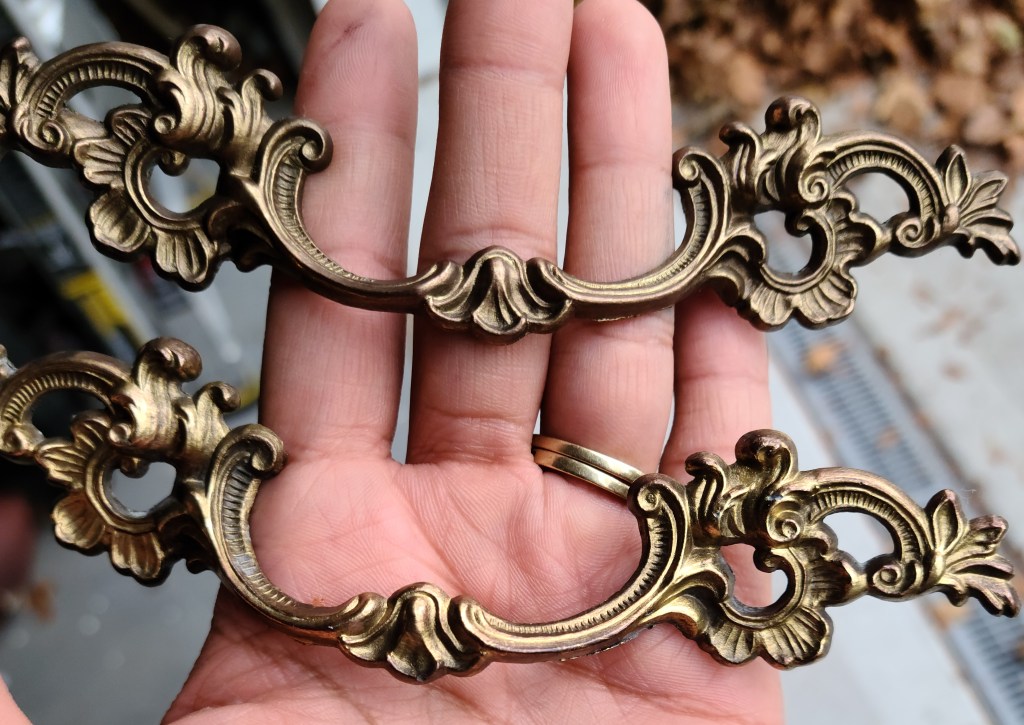
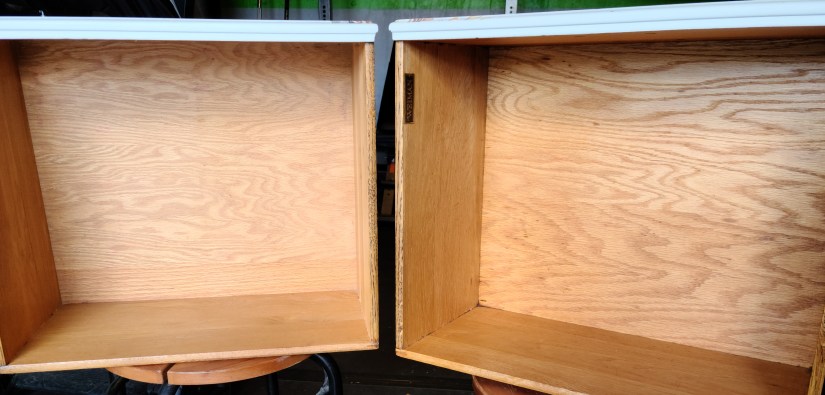
Finally, I used Big Mamma’s Butta to rejuvenate the wood inside of the draws and the areas where the draws slide into. I absolutely love the smell of their orange scent wax. Using a wax brush, I applied the Butta and wiped away any excess with a cloth. Lastly, which this step was really done earlier during the project, I used Dixie Belle’s gilding wax in the color bronze on the pulls.
And there you have it! Staging credit goes to my husband, he suggested I take the photos outside with the leaves. This way is not the most visual selling point photos, but I absolutely love them.
Check out ReImagine Moore on Facebook and Instagram for more photos and latest updates.
Affiliate Disclaimer: ReImagine Moore participates in the Amazon Services LLC Associates Program, and Maika Daughters affiliate program. These affiliate advertising programs are designed to provide a means for sites to earn advertising fees by advertising and linking to Amazon.com and Maikadaughters.com. This means if you purchase an item through a link on this site, I may receive a small commission with no extra cost to you. By using my links, you are showing support and I truly appreciate you for it.
